• Home
  • Setup and configuration
  • Set up Dynatrace on cloud platforms
  • Amazon Web Services
  • Deploy OneAgent on AWS Fargate and AWS App Runner

Deploy OneAgent on AWS Fargate and AWS App Runner

For AWS Fargate and App Runner, monitoring consumption is based on host units. See Application and Infrastructure Monitoring (Host Units) for details.

To deploy OneAgent on AWS Fargate or App Runner, read the instructions provided below.

Prerequisites

  • Create an API token in your Dynatrace environment and enable the following permissions:
    • Access problem and event feed, metrics, and topology (API v1)
    • PaaS integration - Installer download
  • Review the list of supported applications and versions.

Integrate OneAgent into your application image

There are three ways to integrate OneAgent with AWS Fargate applications.

Note: For AWS App Runner, you can only use the build-time injection.

  • Automatic injection (for EKS only) manages upgrades and lifecycle.
Automatic injection
  • Kubernetes version 1.20+
  • Dynatrace version 1.231+
  1. Create an AWS Fargate pod execution role and a Fargate profile for your cluster by following the instructions in Getting started with AWS Fargate using Amazon EKS.

  2. optional If you want the Kubernetes scheduler to run OneAgent in Fargate, add the dynatrace namespace to your Fargate profile in the AWS console.

  3. Create a Dynatrace namespace.

shell
kubectl create namespace dynatrace
  1. Install Dynatrace Operator.
shell
kubectl apply -f https://github.com/Dynatrace/dynatrace-operator/releases/download/v0.4.2/kubernetes.yaml
  1. Create the secret holding the API token for authentication to the Dynatrace cluster.
shell
kubectl -n dynatrace create secret generic dynakube --from-literal="apiToken=API_TOKEN"
  1. Save the DynaKube custom resource definition. Retrieve the applicationMonitoring.yaml file from the GitHub repository.
shell
curl -o applicationMonitoring.yaml https://github.com/Dynatrace/dynatrace-operator/blob/v0.4.2/config/samples/applicationMonitoring.yaml
  1. Adapt the values of the custom resource as follows:
  • required Specify the spec.apiUrl parameter, which is the URL of your Dynatrace environment, for your SaaS, Managed, or ActiveGate instance.

  • optional Configure namespace selectors by setting the spec.namespaceSelector parameter. Namespaces matching this selector will be monitored; the rest will be ignored.

    Note: If no namespaceSelector is specified, all namespaces except the ones starting with kube- or -openshift- will be monitored.

  • optional Configure spec.oneAgent.applicationMonitoring.version using semantic versioning (major.minor.patch - example: 1.203.0). If no version is specified, the OneAgent defaults to the latest version available.

  • optional Configure network zones by setting the spec.networkZone parameter to your network zone.
    See network zones for more information.

  1. optional Configure the injection.
    You can configure the injection through Kubernetes annotations. For details, see Pod annotation list

  2. Create the custom resource

shell
kubectl apply -f applicationMonitoring.yaml
  1. Deploy your applications.
    All deployed pods will then be monitored.

Note: By default, OneAgent logs are located in /opt/dynatrace/oneagent-paas/log inside the instrumented containers. For guidance on troubleshooting possible issues, see Troubleshoot deployment and connectivity errors on Kubernetes.

  • Build-time injection (for ECS, EKS, and App Runner) embeds OneAgent into your container image.
Build-time injection

To use this option you need:

  • Docker version 17.05+.
  • OneAgent version 1.155+.
  1. Sign in to Docker with your Dynatrace environment ID as username and PaaS token as password.
    shell
    docker login -u <your-environment-id> <your-environment-url>
  2. Add two additional lines of code to the application image, after the last FROM command:
    shell
    COPY --from=<your-environment-url>/linux/oneagent-codemodules:<technology> / / ENV LD_PRELOAD /opt/dynatrace/oneagent/agent/lib64/liboneagentproc.so

Note:

  • Replace <your-environment-url> with the URL or IP address of your environment or of your ActiveGate.
    • SaaS {your-environment-id}.live.dynatrace.com1

    • Managed {your-domain}/e/{your-environment-id}1

      1

      If you use your own environment ActiveGate, use the <ip-address>:9999 or <hostname>:9999 format.

  • Replace <technology> with the code module required for your application. Valid options are all, java, apache, nginx, nodejs, dotnet, php, sdk, and go. You can specify several code modules, separated by hyphen (-), for example java-go. Including specific technology-support options, rather than support for all technology options, results in a smaller OneAgent package.

What if my Docker image is based on Alpine Linux?

Dynatrace OneAgent supports Alpine Linux based environments. Use this syntax:

shell
COPY --from=<your-activegate>/linux/oneagent-codemodules-musl:<technology> / / ENV LD_PRELOAD /opt/dynatrace/oneagent/agent/lib64/liboneagentproc.so

Valid options here are all, go, java, apache, nginx, and nodejs.

  1. Build your application image.

Build the Docker image from your dockerfile to use it in your Kubernetes environment:

shell
docker build -t yourapp .

Note: You can monitor your application containers with a different Dynatrace environment. To do this, read the instructions below:

For OneAgent version 1.139+, if you have an existing application image where you've already added the OneAgent code modules for a specific Dynatrace environment, you can have the OneAgent report to another Dynatrace environment without rebuilding your application image.

For this you need to make a call to the REST endpoint of your second Dynatrace environment. Make sure to adapt the respective placeholders <your-environment-id> and <your-paas-token>.

shell
curl "https://<your-environment-id>.live.dynatrace.com/api/v1/deployment/installer/agent/connectioninfo?Api-Token=<your-paas-token>"

In return, you get a JSON object that covers the required information that needs to be passed as an environment variable to the application container. Make sure you set the environment variables of the application container as described below:

  • DT_TENANT: equals tenantUUID
  • DT_TENANTTOKEN: equals tenantToken
  • DT_CONNECTION_POINT: semi-colon separated list of communicationEndpoints
  1. Add the following commands to your current Dockerfile to integrate OneAgent and activate instrumentation of your application. Define variables with optional default values using ARG instructions.
shell
ARG DT_API_URL="https://<your-environment-id>.live.dynatrace.com/api" ARG DT_API_TOKEN="<your-paas-token>" ARG DT_ONEAGENT_OPTIONS="flavor=default&include=<technology1>&include=<technology2>" ENV DT_HOME="/opt/dynatrace/oneagent" RUN mkdir -p "$DT_HOME" && \ wget -O "$DT_HOME/oneagent.zip" "$DT_API_URL/v1/deployment/installer/agent/unix/paas/latest?Api-Token=$DT_API_TOKEN&$DT_ONEAGENT_OPTIONS" && \ unzip -d "$DT_HOME" "$DT_HOME/oneagent.zip" && \ rm "$DT_HOME/oneagent.zip" ENTRYPOINT [ "/opt/dynatrace/oneagent/dynatrace-agent64.sh" ] CMD [ "executable", "param1", "param2" ] # the command of your application, for example, Java

Notes:

  • The commands above that use wget and unzip might fail if they aren't provided by the base image.
  • Replace <your-environment-id> with your Dynatrace environment ID. If you're using Dynatrace Managed, you need to provide your Dynatrace Cluster URL (https://<YourDynatraceServerURL>/e/<your-environment-id>/api).
  • Replace <your-paas-token> with your PaaS token.
  • DT_ONEAGENT_OPTIONS - this is the flavor (valid options are default or musl for Alpine images) and the technology (code module).
    • Syntax for default is flavor=default&include=all.
    • Syntax for musl is flavor=musl&include=all.

What if my Docker image is based on Alpine Linux?

Dynatrace OneAgent supports the flavor musl for Alpine Linux based environments. Valid options for flavor=musl are all, go, java, apache, nginx, and nodejs.

  1. Build your application image.

Build the Docker image from your dockerfile to use it in your Kubernetes environment:

shell
docker build -t yourapp .

Note: You can monitor your application containers with a different Dynatrace environment. To do this, read the instructions below:

For OneAgent version 1.139+, if you have an existing application image where you've already added the OneAgent code modules for a specific Dynatrace environment, you can have the OneAgent report to another Dynatrace environment without rebuilding your application image.

For this you need to make a call to the REST endpoint of your second Dynatrace environment. Make sure to adapt the respective placeholders <your-environment-id> and <your-paas-token>.

shell
curl "https://<your-environment-id>.live.dynatrace.com/api/v1/deployment/installer/agent/connectioninfo?Api-Token=<your-paas-token>"

In return, you get a JSON object that covers the required information that needs to be passed as an environment variable to the application container. Make sure you set the environment variables of the application container as described below:

  • DT_TENANT: equals tenantUUID
  • DT_TENANTTOKEN: equals tenantToken
  • DT_CONNECTION_POINT: semi-colon separated list of communicationEndpoints
  • Runtime injection (for ECS only) pulls OneAgent when the container starts.
Runtime injection

To install Dynatrace OneAgent at runtime, you must deploy your application using a task with two container definitions. One is for downloading and unzipping the OneAgent to a shared volume, the other is your application container, which must mount the same volume.

For the runtime injection, follow the steps below.

  1. Go to Fargate Task Definition > Create New Task Definition > select Fargate > click Next Step.

  2. Name the task, optionally set roles and sizes, then scroll down to Volumes > Add volume. Add a volume of type Bind Mount named oneagent.

Note: You must create a volume before creating container definitions in order to set the shared volume in each container.

  1. Scroll up to Container Definition > choose Add container, and in the Standard subsection, add a container named install-oneagent, set the image to Alpine versions 3.8+ ("alpine:3"), and select the memory limits.

Note: There are two types of memory limits: soft and hard. ECS requires that you define the limit for at least one type of memory. We recommend using the default setting (soft limit of 128 MiBs), as it's less restrictive, but you can adjust it as needed.

  1. Scroll to Environment and do the following:
  • Uncheck the Essential parameter.
  • In the Entry point field, enter /bin/sh,-c.
  • In the Command field, enter ARCHIVE=$(mktemp) && wget -O $ARCHIVE "$DT_API_URL/v1/deployment/installer/agent/unix/paas/latest?Api-Token=$DT_PAAS_TOKEN&$DT_ONEAGENT_OPTIONS" && unzip -o -d /opt/dynatrace/oneagent $ARCHIVE && rm -f $ARCHIVE.
  1. In the Environment variables subsection, define:
  • DT_API_URL - this is the API URL for your Dynatrace environment.
    • For SaaS: https://<your-environment-id>.live.dynatrace.com/api
    • For Managed: https://<cluster>/e/<your-environment-id>/api
    • For ActiveGate: https://<your-active-gate-IP-or-hostname>:9999/e/<your-environment-id>/api.
  • DT_ONEAGENT_OPTIONS- this is the flavor (valid options are default or musl for Alpine images) and the technology (code module).
    • Syntax for default is flavor=default&include=all.
    • Syntax for musl is flavor=musl&include=all.
  • DT_PAAS_TOKEN - this is your PaaS token to download the OneAgent code modules.
  1. Scroll to Storage and logging to define the mount point with the source volume oneagent and the container path /opt/dynatrace/oneagent.

  2. Click Add to create the container definition.

  3. Choose Add container again, this time to define your application, and complete the fields in the Standard subsection according to your application requirements.

  4. Scroll to Environment, and in Environment variable, define LD_PRELOAD with the value /opt/dynatrace/oneagent/agent/lib64/liboneagentproc.so.

  5. Scroll to Startup Dependency Ordering and enter the container name install-oneagent and the condition Complete.

  6. Scroll to Storage and logging to define the mount point with the source volume oneagent and the container path /opt/dynatrace/oneagent.

  7. Select Update to update your container definition.

  8. Deploy the new version of your task definition on your ECS cluster.

Note:

  • On the Logs tab for the install-oneagent container, you can see the code modules' ZIP file being downloaded by wget and being unzipped.
  • On the Logs tab for your application workload container, you can see the code module being loaded by the process.
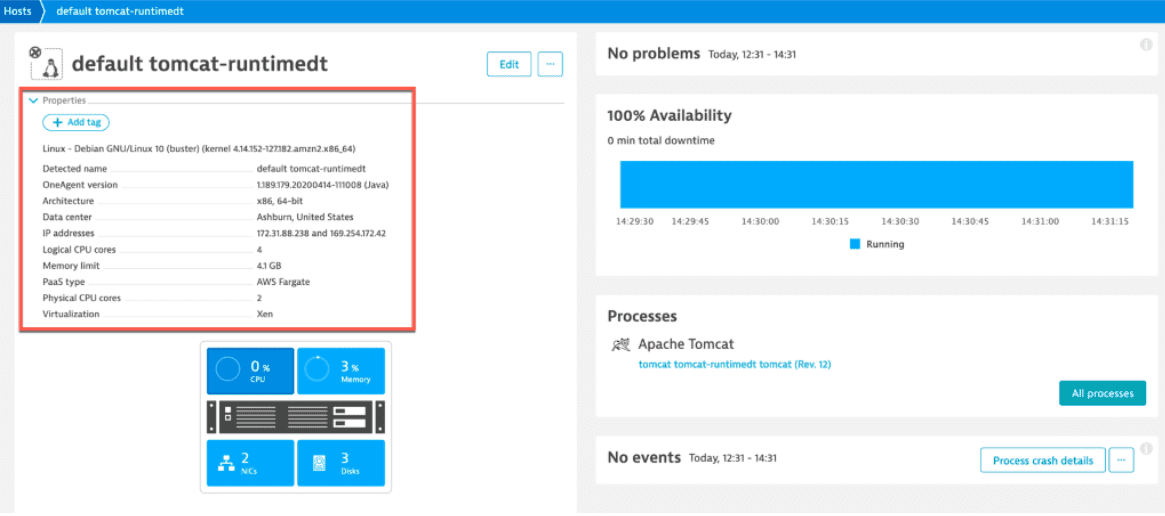
In the Dynatrace web UI, your Fargate application workload container will show up in the Hosts section. The instrumented process will show up in Processes as a typical Docker container.

Fargate

Note: The runtime approach requires Fargate versions 1.3+. For earlier versions, select the build-time approach.

Configure network zones optional

You can configure network zones as an environment variable:

  • DT_NETWORK_ZONE: equals your.network.zone

See network zones for more information.

Related topics
  • Amazon Web Services monitoring

    Set up and configure monitoring for Amazon Web Services.

  • OneAgent platform and capability support matrix

    Learn which capabilities are supported by OneAgent on different operating systems and platforms.