Okta SAML configuration for Dynatrace
Follow the examples below to configure Okta as the SAML identity provider (IdP) for Dynatrace SSO. You can use Okta's pre-built configuration or configure it manually.
This page describes the IdP (Okta) end of your SAML SSO configuration, not the Dynatrace end. Use it as part of the entire SAML configuration procedure for Dynatrace SaaS if you're using Okta.
While we do our best to provide you with current information, Dynatrace has no control over changes that may be made by third-party providers. Always refer to official third-party documentation from your IdP as your primary source of information for third-party products.
Okta Network Integration configuration
Through the Okta Integration Network, you can use an Okta-verified, pre-built configuration to integrate Dynatrace with your Okta IdP for SSO.
-
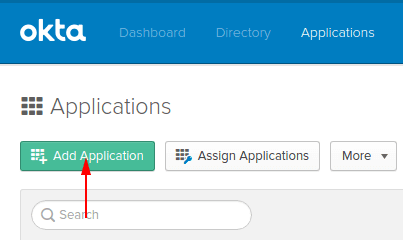
In the Okta interface, select Application from the main menu and click Add Application.
-
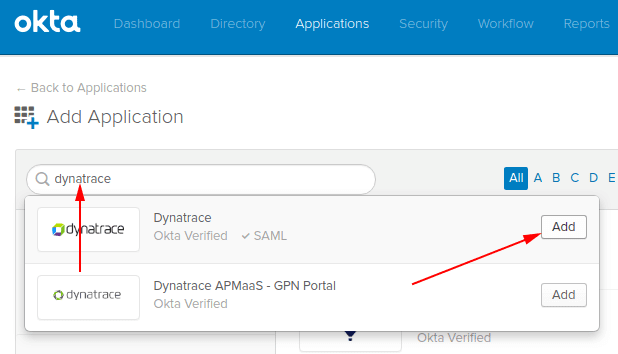
Search for Dynatrace and select Add.
-
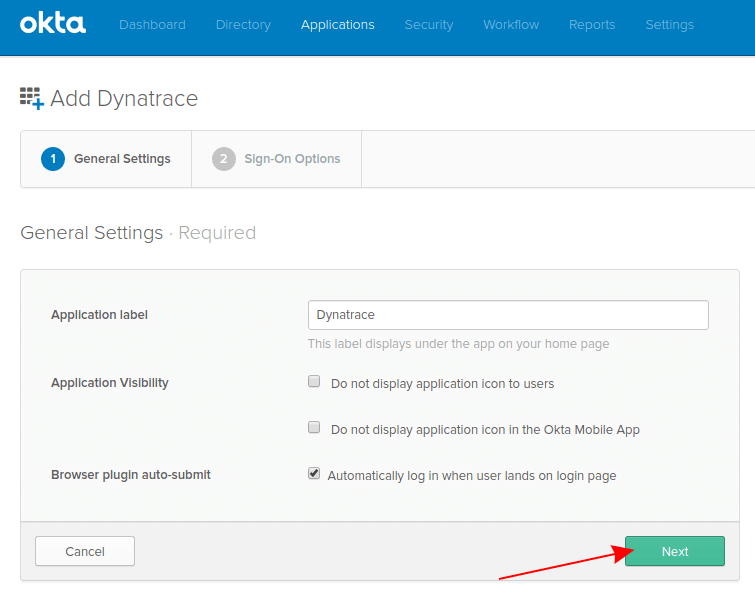
Click Next.
-
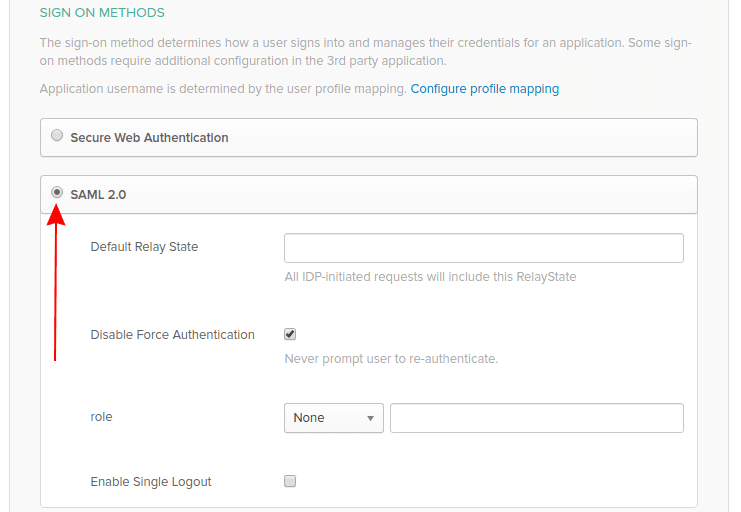
In Sign On Methods, select SAML 2.0.
-
optional Set Default Relay State to your default tenant URL or to other Dynatrace services from the
*.dynatrace.comrealm. If this is not defined, users after signing in will be redirected to the last accessed tenant or account/user profile. -
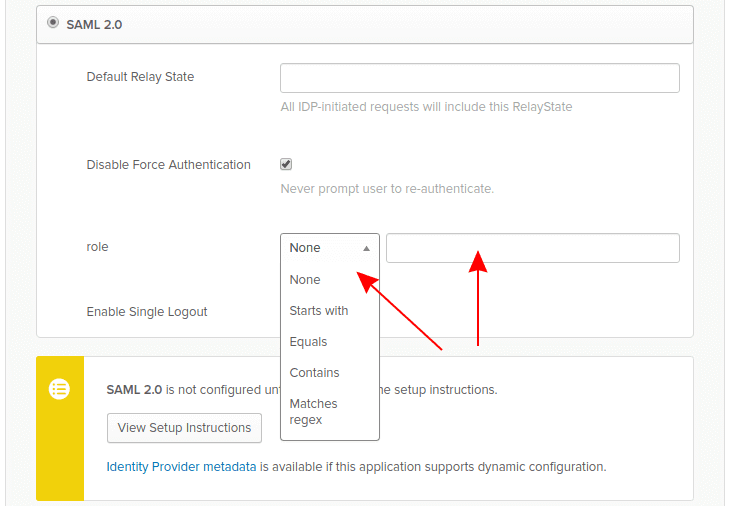
optional Set role as a Security group claim attribute. If configured, Okta will send assigned groups within the SAML Request.
To manage group membership in Okta with SAML Authorization in Dynatrace, this must be configured.
- For more about SAML metadata configuration, see Configure metadata.
- You can configure Security Group Claim attribute filtering using Okta's proprietary expression language. For example, set role to
Matches regexand enter.*as the value to have all groups assigned to the user sent with the SAML request.
-
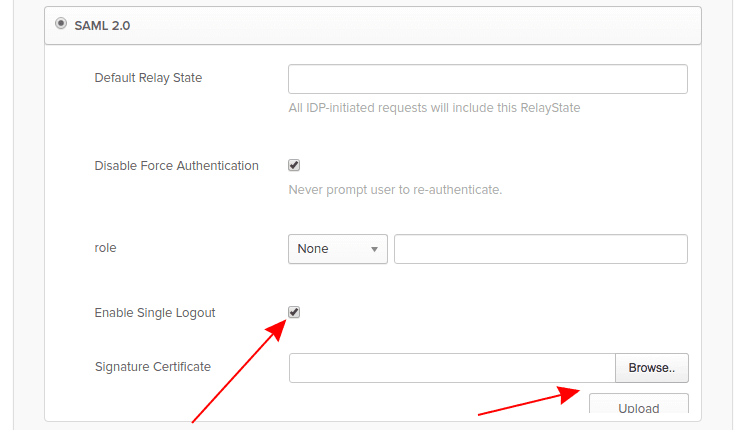
optional Select Enable Single Logout and upload a certificate (Browse and Upload) to enable global single logout. The certificate is provided in Okta's Dynatrace configuration. You need to be signed into the Okta Admin Dashboard.
Okta manual configuration
Use this procedure if you choose to manually integrate Dynatrace with your Okta IdP (rather than using an Okta Network Integration configuration as described above).
-
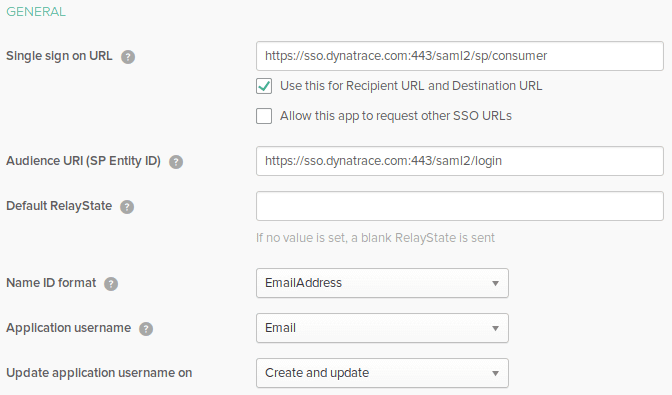
In General settings, follow this example.
Values in the example screen are:
Single sign on URL
https://sso.dynatrace.com:443/saml2/sp/consumer- Use this for Recipient URL and Destination URL is
selected. - Allow this app to request other SSO URLs is
not selected.
Audience URI (SP Entity ID)
https://sso.dynatrace.com:443/saml2/loginName ID format
EmailAddressApplication username
EmailUpdate application username on
Create and update - Use this for Recipient URL and Destination URL is
-
Select
Show Advanced Settingsfor additional configuration settings as shown in the example.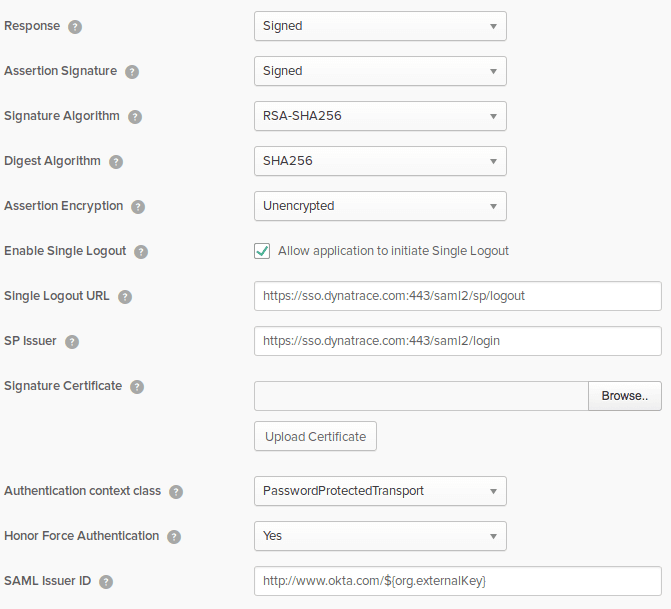
Values in the example screen include:
Response
Signed(required)Assertion Signature
Signed(optional)Signature Algorithm
RSA-SHA256Digest Algorithm
SHA256Assertion Encryption
Unencrypted(required)Enable Single Logout and Single Logout URL
If you want to enable single logout service with Dynatrace SSO:
- Select Enable Single Logout
- Enter a Single Logout URL:
https://sso.dynatrace.com:443/saml2/sp/logout
SP Issuer
https://sso.dynatrace.com:443/saml2/loginSignature Certificate
The certificate file required by Okta for SSO application configuration can be converted from an X509Certificate using, for instance, this online tool. The result should be just a X509Certificate wrapped with a header. You can find the Dynatrace SSO metadata for the certificate file at:
https://sso.dynatrace.com/sso/metadata -
Configure attribute statements to enable SAML authorization in Dynatrace SSO.
- In the Attribute Statements section, add entries for first name and last name.
- In the Group Attribute Statements section, add an entry to enable mapping of groups between the Okta IdP and Dynatrace SSO.
Values displayed here are only examples.
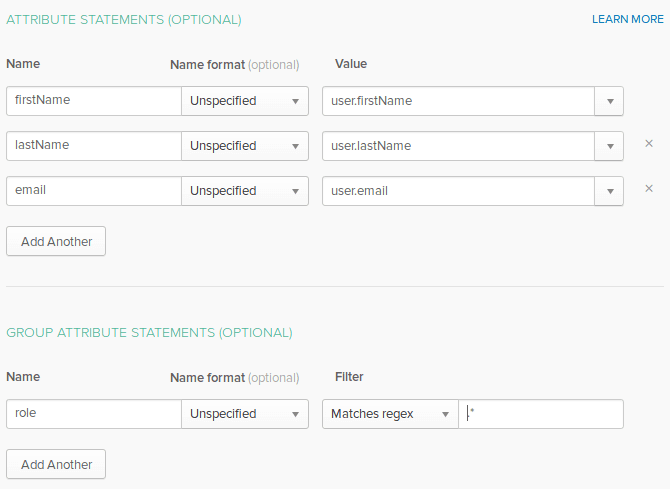
Attribute names need to match the Dynatrace federated attribute values on the Dynatrace Single sign-on page:
First name attributeLast name attributeSecurity group claim attribute
You can configure Group Attribute Statements filtering using Okta's proprietary expression language. For example,
.*means that all groups assigned to the user will be sent with the SAML request.