Edit dashboards
Latest Dynatrace
Use these procedures to edit your dashboard.
Add
Create a dashboard
To create a new dashboard
-
Go to Dashboards.
-
In the Dashboards panel, select
 New dashboard.
Query Grail
The fastest and easiest way to explore your logs or metrics is with our new Explore tiles and sections. In a few seconds, you can find and analyze your logs or metrics. No DQL required!
To Query Grail
-
In the upper-right of the dashboard, open the
Add menu and select  Query Grail.
A configuration side panel opens on the right to display two tabs:
- Query
- Visualize
-
On the Query tab, use the Dynatrace Query Language (DQL) to define your query.
-
Select Run to execute the query.
-
On the Visualize tab, choose a visualization format for your results.
 means the visualization type is recommended for your query.
 means the visualization type is unavailable for your query.
-
Under the Visualization selector, expand the options section to adjust visualization settings as needed.
-
Close the side panel when you're done.
If you want to return to these settings, select your tile to display them.
For details, see Add data to a dashboard.
Add code
To add code to a dashboard
-
In the upper-right of the dashboard, open the
Add menu and select  Add code.
An empty tile is added to the dashboard and an Options side panel opens on the right.
-
optional In Tile title, enter a title to display at the top of your tile.
-
In the numbered Code box, enter custom JavaScript to fetch external data from any available API. Use the Fetch API to fetch data from external APIs.
To make sure your requests aren't blocked, ask your administrator to allow your external data sources by adding them to the Limit outbound connections settings.
-
Go to Settings and open Preferences > Limit outbound connections.
-
Select Add item and add the address of the web service you'd like to connect to.
Don't include the address prefix. For example, if the address is
https://some.service.org, just addsome.service.org. -
Select Save changes.
This way you can granularly control the web services your dashboard can connect to.
-
For details, see Add code to a dashboard.
Add markdown
To add a markdown tile to a dashboard
-
In the upper-right of the dashboard, open the
Add menu and select  Add markdown.
An Options side panel opens on the right.
-
In the Options side panel, enter your text.
Use Markdown to format your text and add links and images.
The tile is updated as you edit.
While you're editing text, press Ctrl+Space to see options.
-
Close the Options side panel when you're done.
For details, see Add Markdown to dashboard.
Add variable
Use variables to filter your dashboards, to act as variable values in code tiles, and as placeholders in tile titles and Markdown tile text.
To add a variable to a dashboard
-
In the upper-right of the dashboard, open the
Add menu and select  Add variable.
The Variable panel is displayed.
-
Define the variable.
- Name: the name of the variable.
Only alpha-numerical values are allowed
- A variable name must not start with
dt_
- Type: can be one of the following:
- Query: the value is returned from a query you enter when you define the variable.
- Select Run query to test your query.
- Code: the value is returned from code you enter when you define the variable.
- CSV: a comma-separated values (CSV) list of values.
- To define possible values, enter them (separated by commas) in the box under Type.
- To define a default value, select one from the Default value list.
- To allow multiple values to be selected at the same time, turn on Multi-select.
- Text: free text. You can enter a Default value. Your changes are saved automatically.
- Query: the value is returned from a query you enter when you define the variable.
- Name: the name of the variable.
-
If you want to add another variable, select
Variable. -
When you're finished, select < Variable to go to the Variables panel or close the panel to display the dashboard.
For details, see Add a variable to a dashboard.
Add snippet
To get started based on a snippet
-
In the upper-right of the dashboard, open the
Add menu and select Add snippet > [snippet category] > [snippet name].The edit panel displays the snippet.
-
Edit the query or code (depending on the snippet type you selected) and the visualization settings as needed.
-
Select Run query.
-
In the Result section, select Select visualization to choose a visualization format for your results.
-
Select < Options to return to the Options panel.
-
In the Result section, select Customize… to adjust visualization settings as needed.
-
Select < Options to return to the Options panel.
-
Review the results.
-
Close the side panel when you're done.
For details, see Add a snippet to a dashboard.
Layout
Move a tile
You can move one tile at a time or select and move multiple tiles simultaneously.
To move one tile at a time
Hover over the tile to display the tile-specific commands.
- Select and drag
 Move to drag the selected tile to a new location.
To move multiple tiles simultaneously
Click one tile to select it.
- Ctrl-click additional tiles that you want to move.
Each selected tile is highlighted.
The total number of selected tiles is displayed on the tile command bar.
- Select and drag Move to drag all of the selected tiles to a new location.
Resize a tile
To resize a tile
Hover over the tile to display the tile-specific commands.
- Select and drag Resize in the lower-right corner of the tile to change the size and shape of the tile.
Copy and paste a tile
You can copy and paste tiles to the same dashboard or another dashboard.
To copy and paste one tile
-
Hover over the tile to display the tile-specific commands.
-
On the tile command bar, select
 Copy to clipboard.
The selected tile is copied to your clipboard.
-
Paste the tile (Ctrl-V).
- You can paste the copied tile to the current dashboard, in which case it's the equivalent of
 Duplicate.
 You can switch to another dashboard and paste the copied tile there.
- You can paste the copied tile to the current dashboard, in which case it's the equivalent of
To copy and paste multiple tiles simultaneously
-
Click one tile to select it.
-
Ctrl-click additional tiles that you want to copy and paste.
Each selected tile is highlighted.
The total number of selected tiles is displayed on the tile command bar.
-
On the tile command bar, select
Copy to clipboard.The selected tiles are copied to your clipboard.
-
Paste the tiles (Ctrl-V) to the same dashboard or switch to another dashboard and paste them there.
Open a tile with another app
To open one or more tiles with a different application
-
Hover over the tile to display the tile-specific commands and then select
 More actions >
  Open with.
You can select and open multiple tiles in another application simultaneously.
Select one of the tiles that you want to open in another application.
Ctrl-Click the remaining tiles that you want to open in another application. All selected tiles will be highlighted.
- Select Open with….
-
In the Open with… window, select the other application in which you want to open the tile.
Example
In this example, we have a useful section of a notebook that we want to copy over to a dashboard.
To copy a notebook section to a dashboard (as a dashboard tile)
-
In the notebook, select the notebook section that you want to copy to a dashboard.
-
Select
> Open with. -
In the Open with… window, select the Dashboards option.
A Select destination box is displayed.
-
In Select destination, you can create a new dashboard or select an existing dashboard.
-
Select Add.
The dashboard opens with the selected section copied into it.
For details, see Open with.
Duplicate a tile
You can duplicate one tile at a time or duplicate multiple tiles simultaneously.
To duplicate one tile
-
Hover over the tile to display the tile-specific commands.
-
Select
Duplicate.A copy of the tile is created on the current dashboard.
To duplicate multiple tiles simultaneously
-
Click one tile to select it.
-
Ctrl-click additional tiles that you want to duplicate.
Each selected tile is highlighted.
The total number of selected tiles is displayed on the tile command bar.
-
On the tile command bar, select
Duplicate.The selected tiles are duplicated on the current dashboard.
Delete a tile
You can delete one tile at a time or select and delete multiple tiles simultaneously.
To delete one tile
Hover over the tile to display the tile-specific commands.
- On the tile command bar, select More actions >
 Delete.
 - In the Are you sure you want to delete this tile? message, select Cancel or Delete.
To delete multiple tiles simultaneously
Click one tile to select it.
- Ctrl-click additional tiles that you want to delete.
Each selected tile is highlighted.
The total number of selected tiles is displayed on the tile command bar.
- On the tile command bar, select Delete.
- In the Are you sure you want to delete this tile? message, select Cancel or Delete.
Edit a tile
To edit a tile
-
Hover over the tile to display the tile-specific commands.
-
Select
 Edit.
Edit.An Options panel opens on the right to display the tile or section configuration.
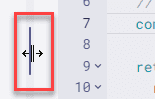
-
Select and drag the expander control left or right as needed to resize the Options panel for a better look at the code.
Download result
To download (export) the result of the current dashboard tile or notebook section
-
Hover over the tile or section to display available commands.
-
On the command bar, select
More actions >  Download result > [format].
The result is downloaded to a local file in the selected format.
The selection of download formats available depends on the visualization.
- CSV: The result is downloaded to a local comma-separated values (*.csv) file
- JSON: The result is downloaded to a local JSON (*.json) file
Some visualizations offer no option for downloading the result.
Troubleshooting
Dynatrace version 1.277+ Dashboards app version 1.10.0+
-
In Dynatrace version 1.276 and earlier, in the Dashboards app, values from query, code, and CSV variables were automatically converted to numbers where possible.
-
In Dynatrace version 1.277+ (Dashboards app version 1.10.0+), all such variable values are returned as strings.
Issue: Starting with Dynatrace version 1.277, errors might occur in some previously existing Dashboards app dashboards that depend on the previous conversion (for example, your query expects a number, but it now receives a string).
Solution: Use DQL conversion functions in your queries to convert values as needed.