Ownership app
Latest Dynatrace
The Ownership app  provides actions for building a workflow querying for an entity's ownership team and related contact information. With these actions, you can extract ownership data about an entity and integrate with other apps, for example, to send Slack notifications or Jira updates to entity owners based on different triggers.
Furthermore, the Ownership app enables you to import teams from the following sources using automation workflows:
- Groups from Microsoft Entra ID
- Groups from ServicNow
Any data source using JSON structure
See Capabilities for details.
Permissions
-
Ownership
requires the following permissions.environment-api:entities:read—Read entities.settings:objects:read—Read settings 2.0 objects.settings:schemas:read—Read settings 2.0 schemas.
-
Additionally, you require the following primary permissions in Workflows (go to Workflows > Settings > Authorization Settings).
app-engine:apps:run—Enables listing and running apps; provides basic access to the Launcher.app-engine:functions:run—Enables use of the function executor.
Alternatively, you can set up users with the AppEngine user policy.
Capabilities
The core capabilities of Ownership in the latest Dynatrace are contained in prebuilt actions for Workflows  . You can combine these actions with other tasks and actions to create workflows for team import, notifications, task assignment, and other use cases.
import_teams
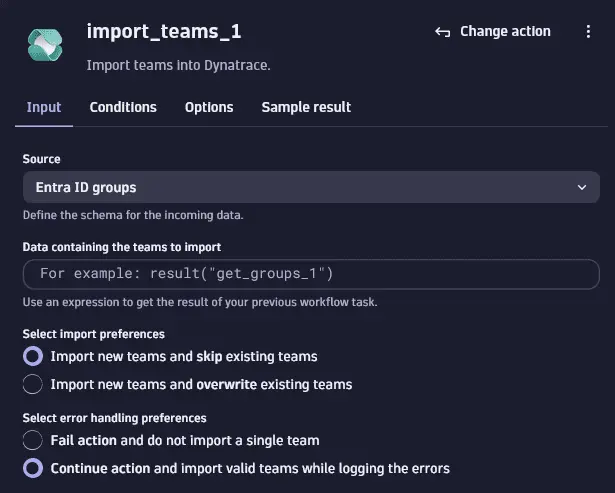
This action allows importing Ownership teams into Dynatrace from different data sources. For all supported sources, we provide workflow templates that can be used as a reference.
-
Entra ID groups
The
import_teamsaction takes the results of the prebuiltget_groupsaction, which gets group data from Microsoft Entra ID, and stores the data as ownership teams within Dynatrace. In this way, you can use your Entra ID information to assign team owners to Dynatrace-monitored entities without creating teams from scratch.-
Ensure that the
get_groupsaction precedes theimport_teamsaction within the same workflow. We recommend that theimport_teamsaction should immediately follow theget_groupsaction.Important for importing Entra ID groups as ownership teams:
- You always need to include
idanddisplayNamein$select; these fields are mapped to the imported ownership team's Team identifier and Team name, respectively. - We recommend that you always include the
mailNicknameparameter inget_groups. This field has unique values in Entra ID and is set as a unique, human-readable Supplementary Identifier for your imported ownership team within Dynatrace. - The Object Id from Entra ID, imported via the
idparameter, is set as the unique Team identifier as well as the External ID of the imported ownership team. - The
mailparameter is set as the Email of the imported ownership team.
- You always need to include
-
Select Entra ID groups as the Source of data on the Input tab in the
import_teamsaction. -
Set Data containing the teams to import to
{{ result("get_groups") }}—this uses the result ofget_groupsas the input forimport_teams. -
Select import preferences.
Team import from Entra ID cannot be reversed. However, you can selectively import and protect changes to previously imported information when you choose one of the following.
-
If you've already imported teams from Entra ID, you can opt to Import new teams and skip existing teams. This option ensures that the imported team IDs don't overwrite any team information already stored in Dynatrace. This option allows for team maintenance and scheduled runs of team import.
This option is useful when you've previously imported teams and then modified the imported information in Dynatrace. In such cases, Dynatrace, not Entra ID, is the source of truth about your existing ownership teams, and you don't want subsequent runs of
import_teamsto overwrite your current information. -
If you want to import teams from Entra ID from scratch, select Import new teams and overwrite existing teams. For the team IDs being imported, this option overwrites any team information that already exists in Dynatrace.
-
-
-
ServiceNow groups
The
import_teamsaction takes the results of the prebuiltget_groupsaction, which gets group data from ServiceNow, and stores the data as ownership teams within Dynatrace. In this way, you can use your ServiceNow information to assign team owners to Dynatrace-monitored entities without creating teams from scratch.-
Make sure that the
get_groupsaction precedes theimport_teamsaction within the same workflow. We recommend that theimport_teamsaction should immediately follow theget_groupsaction. -
Select ServiceNow groups as the Source of data on the Input tab in the
import_teamsaction. -
Set Data containing the teams to import to
{{ result("get_groups") }}—this uses the result ofget_groupsas the input forimport_teams. -
Select import preferences.
Team import from ServiceNow cannot be reversed. However, you can selectively import and protect changes to previously imported information when you choose one of the following.
-
If you've already imported teams from ServiceNow, you can opt to Import new teams and skip existing teams. This option ensures that the imported team IDs don't overwrite any team information already stored in Dynatrace. This option allows for team maintenance and scheduled runs of team import.
This option is useful when you've previously imported teams and modified the imported information in Dynatrace. In such cases, Dynatrace, not ServiceNow, is the source of truth about your existing ownership teams, and you don't want subsequent runs of
import_teamsto overwrite your current information. -
If you want to import teams from ServiceNow from scratch, select Import new teams and overwrite existing teams. For the team IDs being imported, this option overwrites any team information that already exists in Dynatrace.
-
-
-
JSON
import_teamsenables you to import ownership team information that was previously generated as a JSON array by therun_javascriptaction within the same workflow. This approach enables you to retrieve team information from any third-party database in the structured format specified in the ownership configuration JSON schema (builtin:ownership.config) that Dynatrace provides.-
Make sure that the
run_javascriptaction precedesimport_teamswithin the same workflow. We recommend that theimport_teamsaction should immediately follow therun_javascriptaction. The result ofrun_javascriptshould be a JSON array thatimport_teamscan consume. -
In
import_teams, select JSON in Ownership schema as the Source of data on the Input tab. -
Set Data containing the teams to import to
{{ result("run_javascript_1") }}—this is the result ofrun_javascript. -
Select import preferences.
Team import from JSON cannot be reversed. However, you can selectively import and protect changes to previously imported information when you choose one of the following.
-
Import new teams and skip existing teams ensures that for the team IDs being imported, any team information already stored in Dynatrace is not overwritten. This option allows for team maintenance and scheduled runs of team import.
This option is useful when you've previously imported teams and then modified the imported information in Dynatrace. In such cases, you don't want subsequent runs of
import_teamsto overwrite your current information. -
To import teams from scratch, select Import new teams and overwrite existing teams. For the team IDs being imported, this option overwrites any team information that already exists in Dynatrace.
-
-
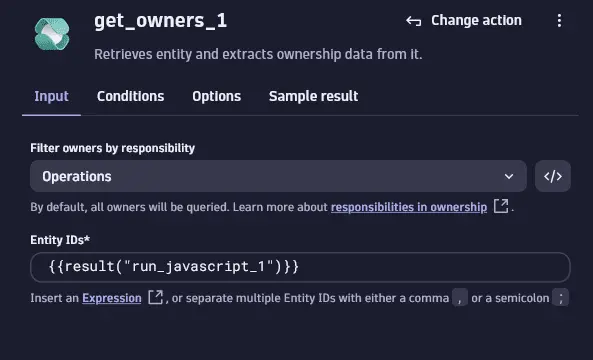
get_owners
This action assumes that you have set up ownership teams in Dynatrace and assigned them to monitored entities.
get_owners enables you to retrieve the associated ownership teams included in the metadata of specified entities.
This action takes an entity ID as input but can also infer the entity ID based on prior workflow logic.
You can optionally filter for teams based on responsibilities contained in team definitions (Filter owners by responsibility).
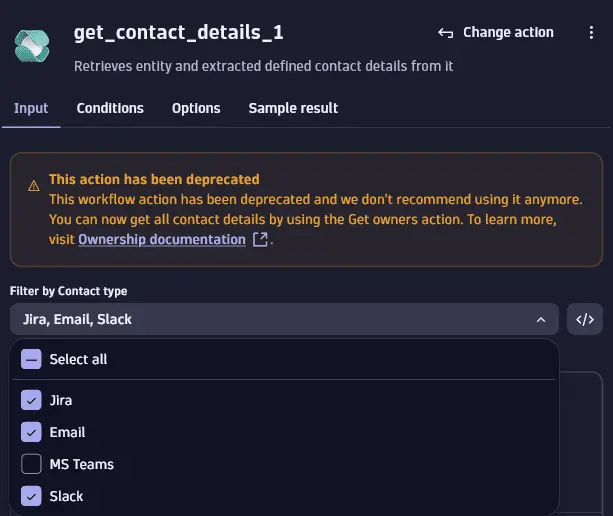
get_contact_details deprecated
This workflow action has been deprecated as of Ownership app version 1.4.0, and we don't recommend using it anymore. As you can now get all contact details, such as email addresses and Slack channels, in the results of the get_owners action, get_contact_details is no longer required.
This action assumes that you have set up ownership teams in Dynatrace and assigned them to monitored entities.
get_contact_details enables you to easily extract team contact details such as an email address or Slack channel.
This action can only come after get_owners in a workflow and takes the output of get_owners as its input ({{result("get_owners")}}). You can optionally filter for the specific type of contact information to retrieve (Filter by contact type).
Automation Workflow Creator Sample
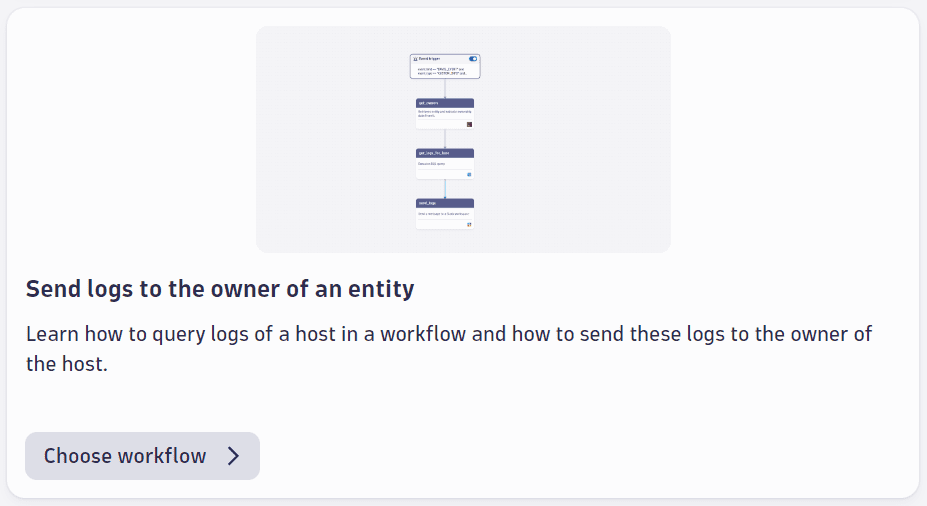
Using Ownership in Workflows is best exemplified by the Send logs to the owner of an entity tutorial in Automation Workflow Creator Sample. You can save the tutorials in Automation Workflow Creator Sample as notebooks, enabling you to view detailed instructions and run code snippets for sample workflows.
You can use Automation Workflow Creator Sample to familiarize yourself with using prebuilt ownership actions in Workflows. Read more about Automation Workflow Creator Sample in Dynatrace Developer.
-
Go to Automation Workflow Creator Sample.
-
Scroll to the Send logs to the owner of an entity sample and select Choose workflow.
-
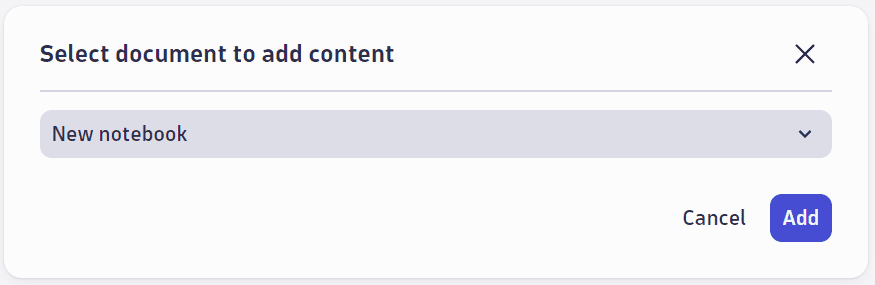
Save the tutorial to a new or existing notebook and select Add.
Your detailed tutorial is now available in Notebooks
 with detailed instructions, code samples that you can run, and links to a sample workflow.
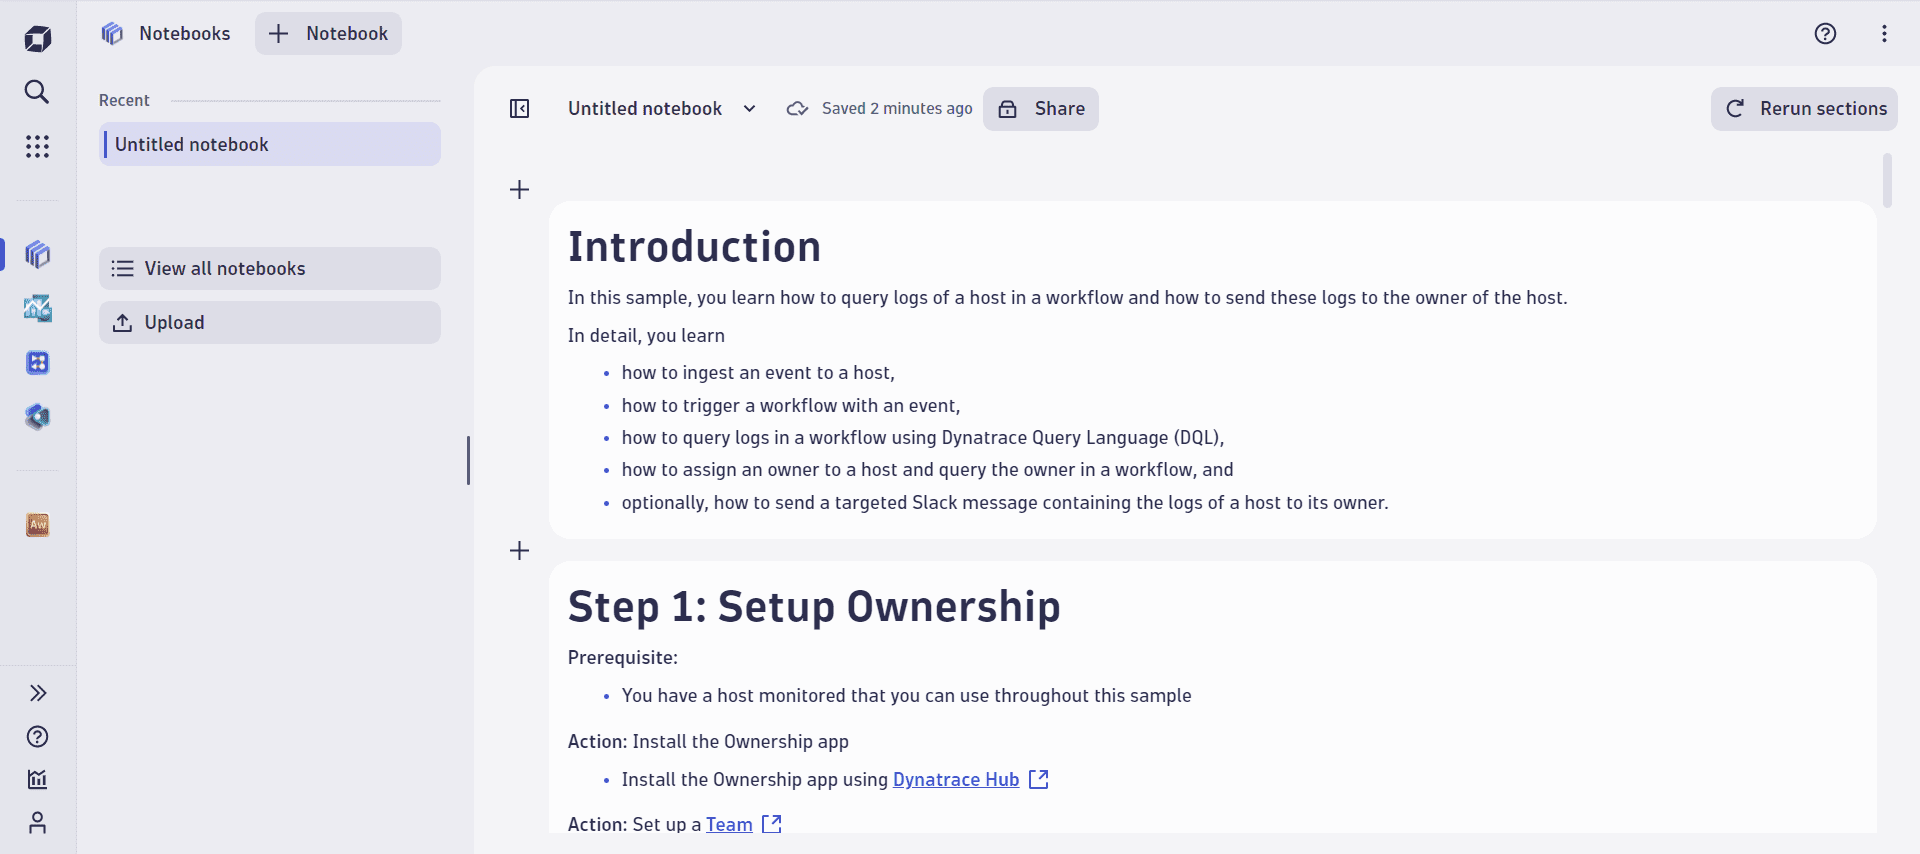
-
Scroll and select the link to the sample workflow Automation Samples: Targeted Notifications that you can modify to suit your purposes.
Tutorial steps and sample workflow
This section provides context for and walks you through the Ownership tutorial and sample workflow set up above. The tutorial is saved in Notebooks while the sample workflow is saved in Workflows .
-
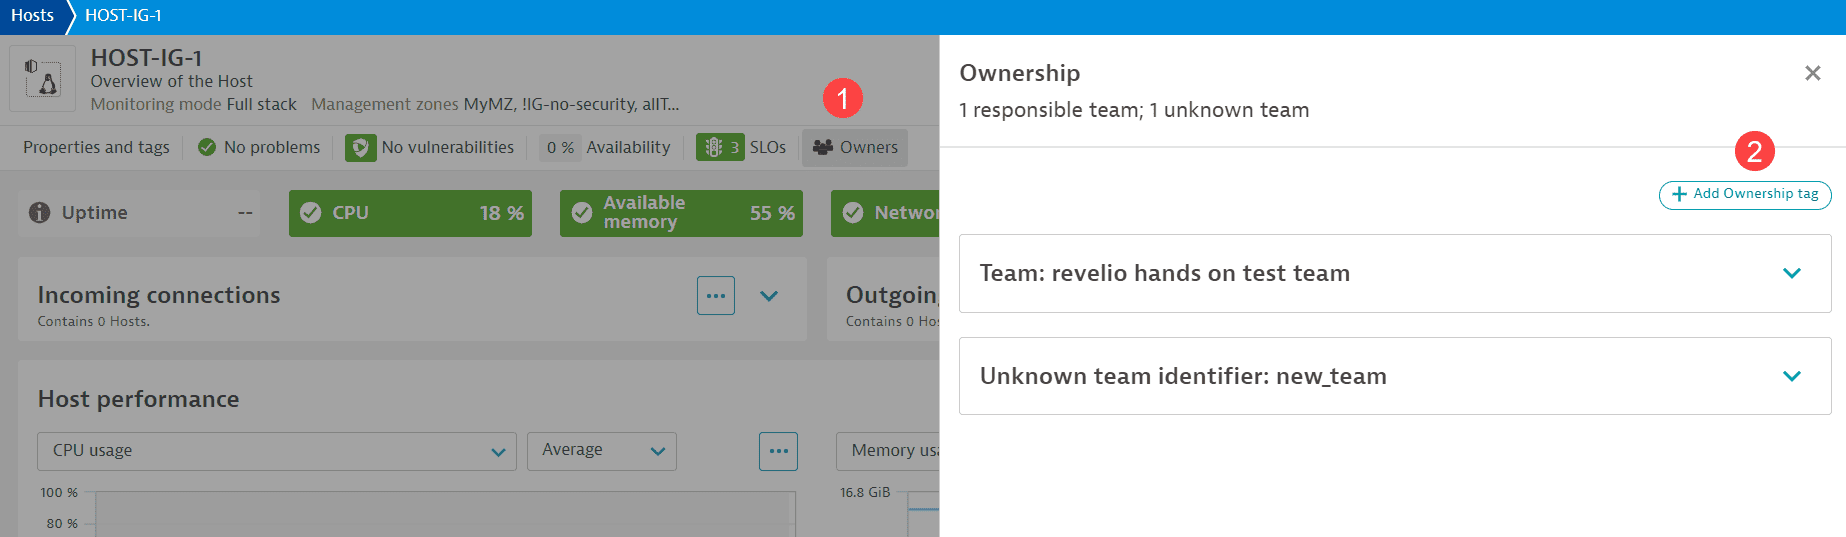
Step 1: Assign owners to a host.
As a prerequisite, you need to have set up ownership and assigned a team to a host in your environment. Read more on the available methods in Assign ownership teams to monitored entities. Note that you can apply a tag for ownership directly on the host overview page—select Owners at the top of the page and then select Add Ownership tag.
-
Step 2: Simulate a host event.
As an aid to the tutorial, this step simulates a host event of type Custom info; in an actual scenario, the host would experience an event or problem that triggers a workflow.
In the sample code provided, paste the host ID as shown below and select Run code. You can find the host ID in the URL of the host overview page.
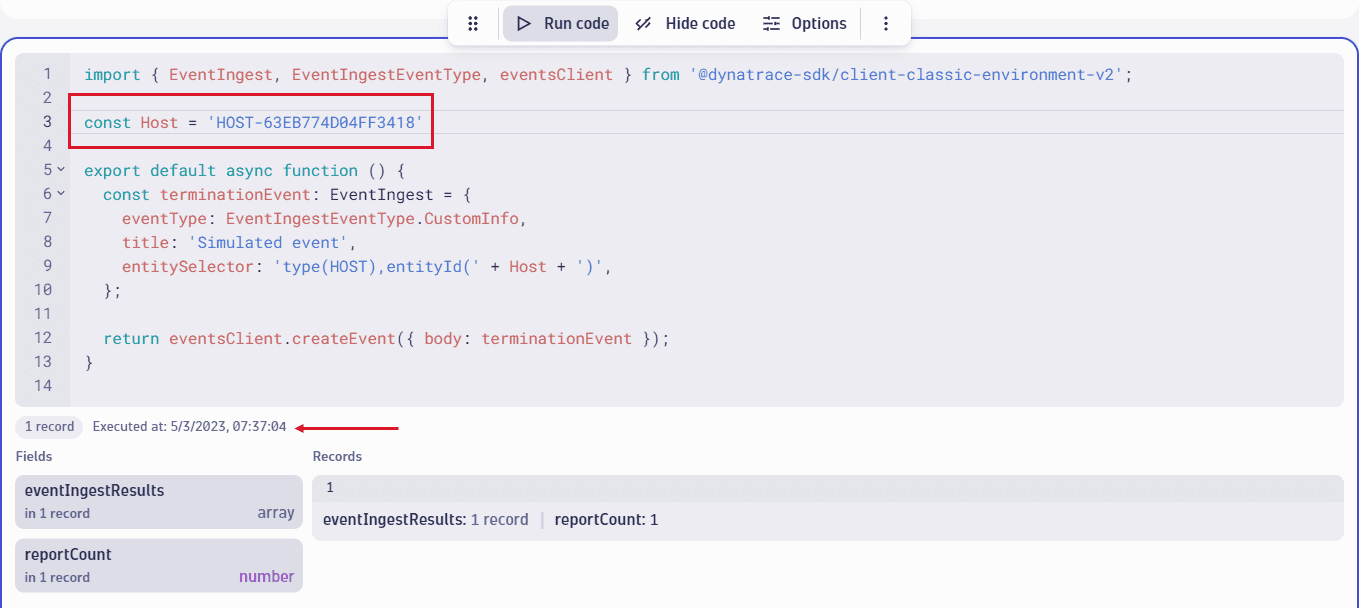
You can see the event on the Events card of the host overview page.

-
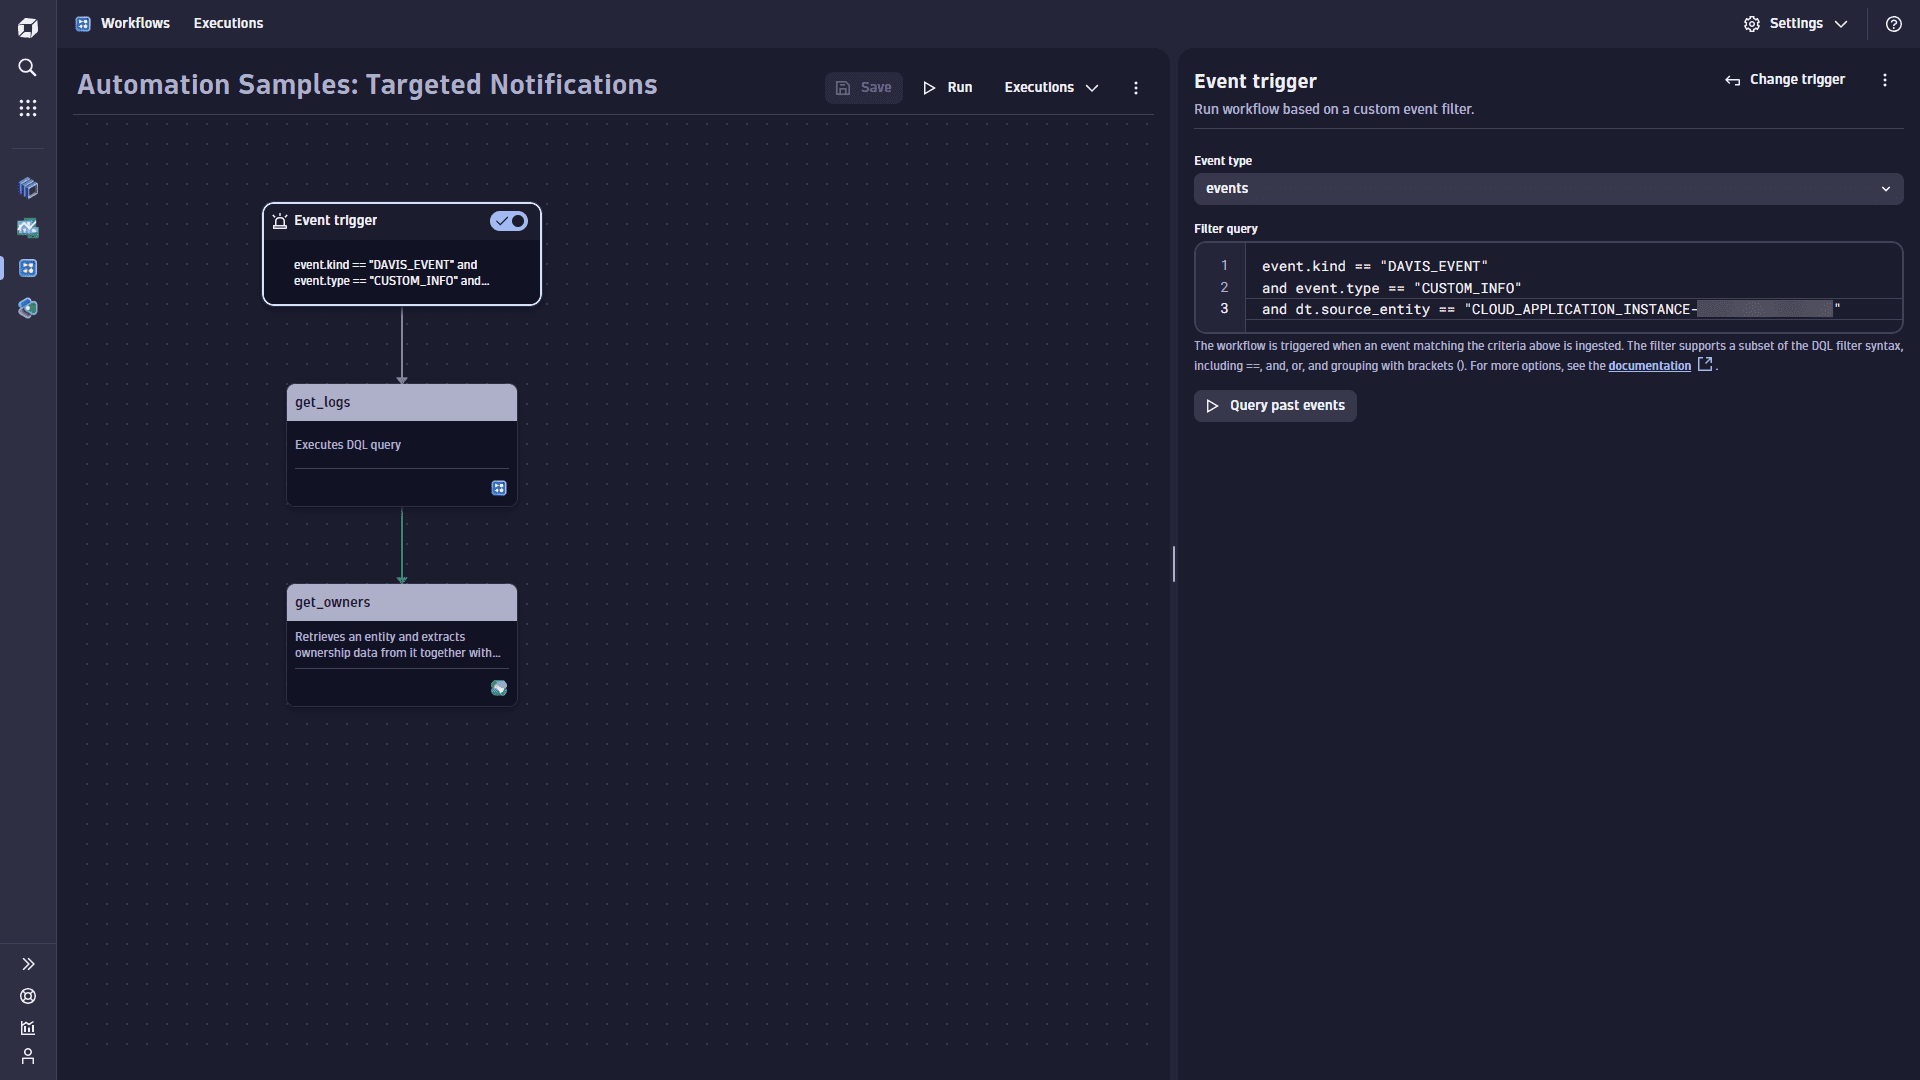
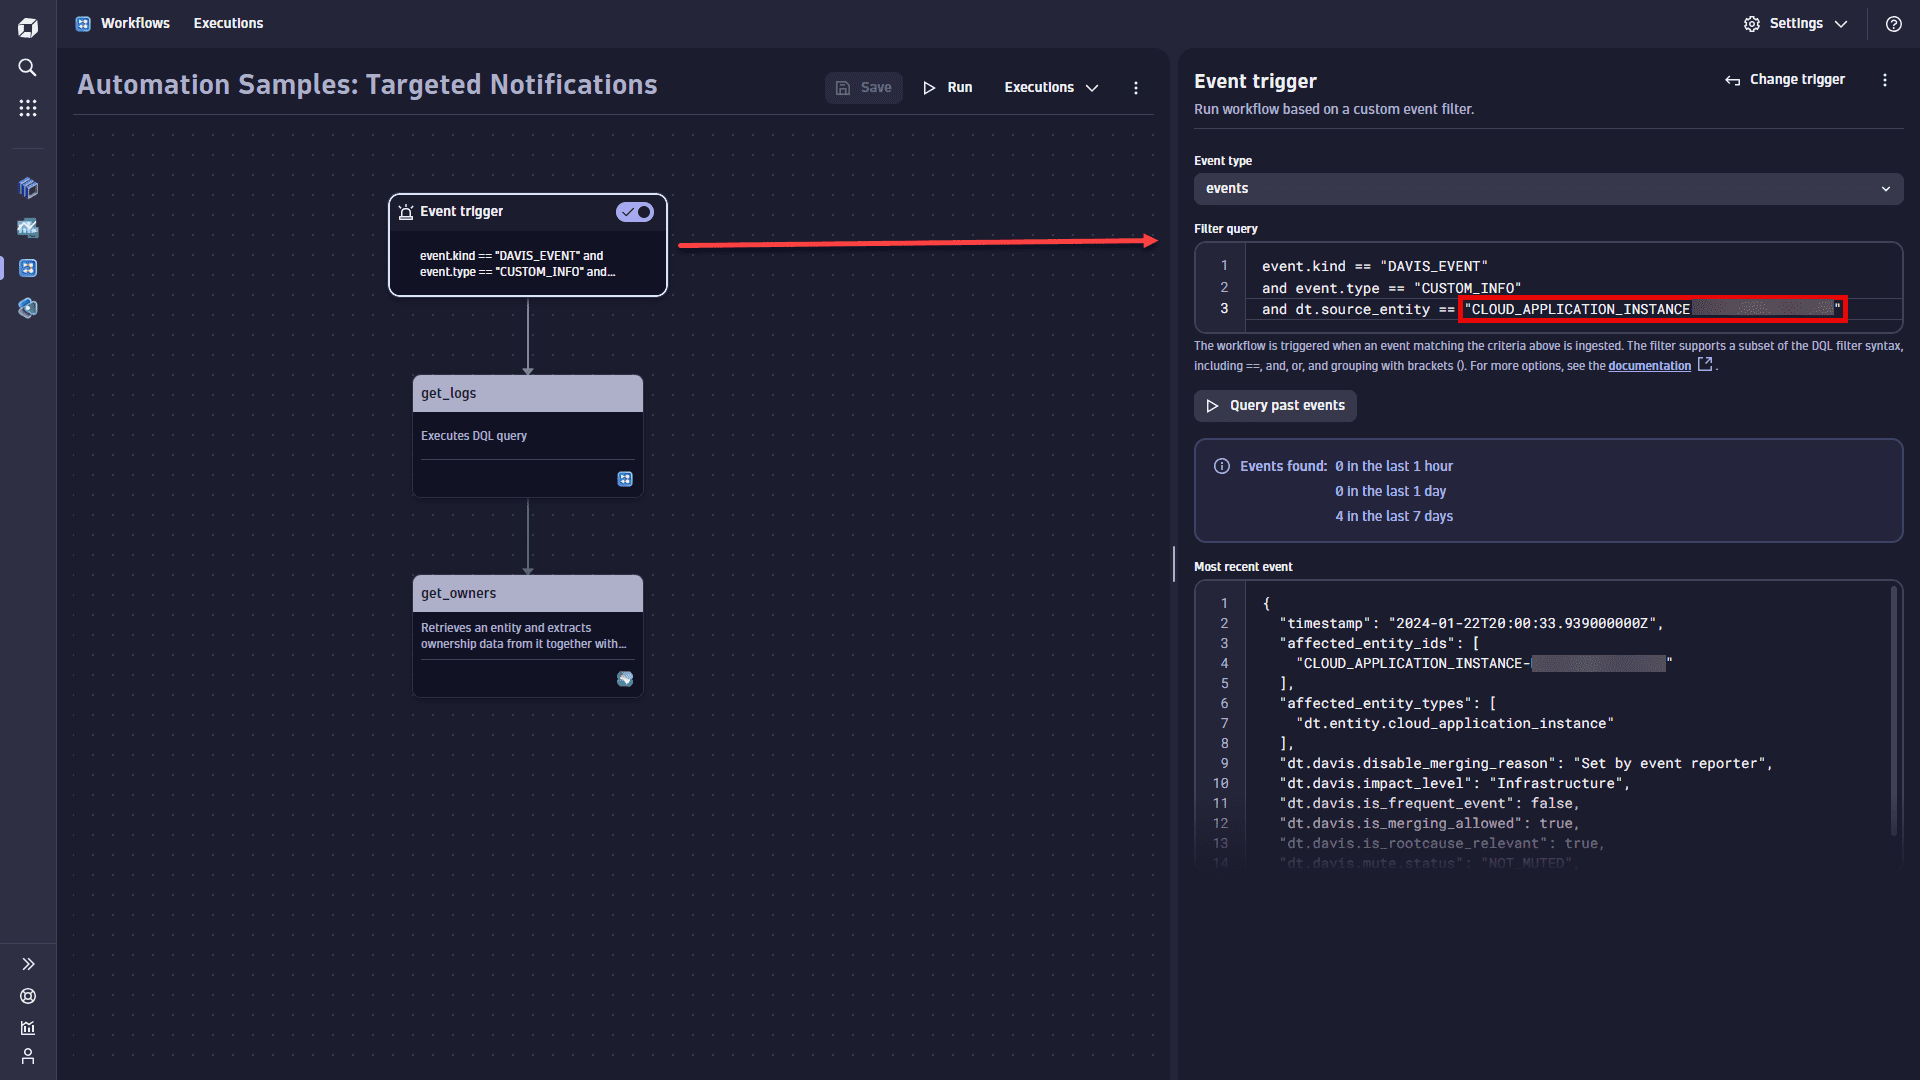
Step 3: Fetch events; set up a workflow event trigger.
Step 3 of the tutorial takes the host ID as input to execute a DQL query that fetches host events of the
CUSTOM_INFOtype.This corresponds to the first task in the Automation Samples: Targeted Notifications sample workflow, which sets up an event-based trigger for the workflow. Insert the host ID as shown and select Query events. The image below shows task output and details for the most recent event.
-
Step 4: Fetch host logs.
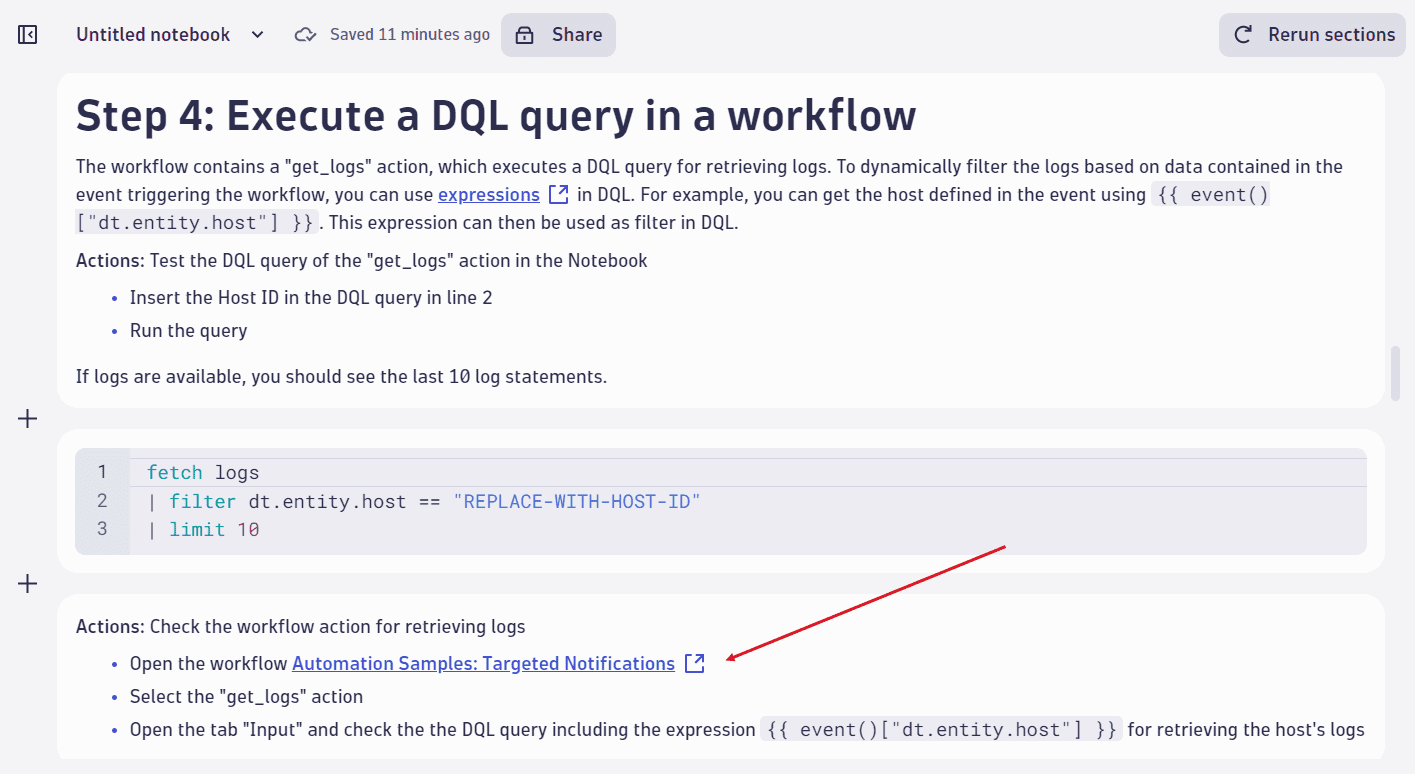
This tutorial step corresponds to the second task of the sample workflow, in which the
get_logsaction fetches the last 10 logs for the host. You need to provide the host ID to run the sample code in the tutorial. However, the workflow uses the code{{ event()["dt.entity.host"] }}to fetch logs for the host already defined in the workflow trigger. -
Step 5: Fetch host ownership information (
get_ownersaction).This tutorial step explains the
get_ownersaction in the Automation Samples: Targeted Notifications sample workflow.get_ownersrequires an entity ID as input to fetch associated ownership team information. However, within the sample workflow,get_ownersuses the code{{ event()["dt.entity.host"] }}to fetch the teams for the host already defined in the workflow trigger.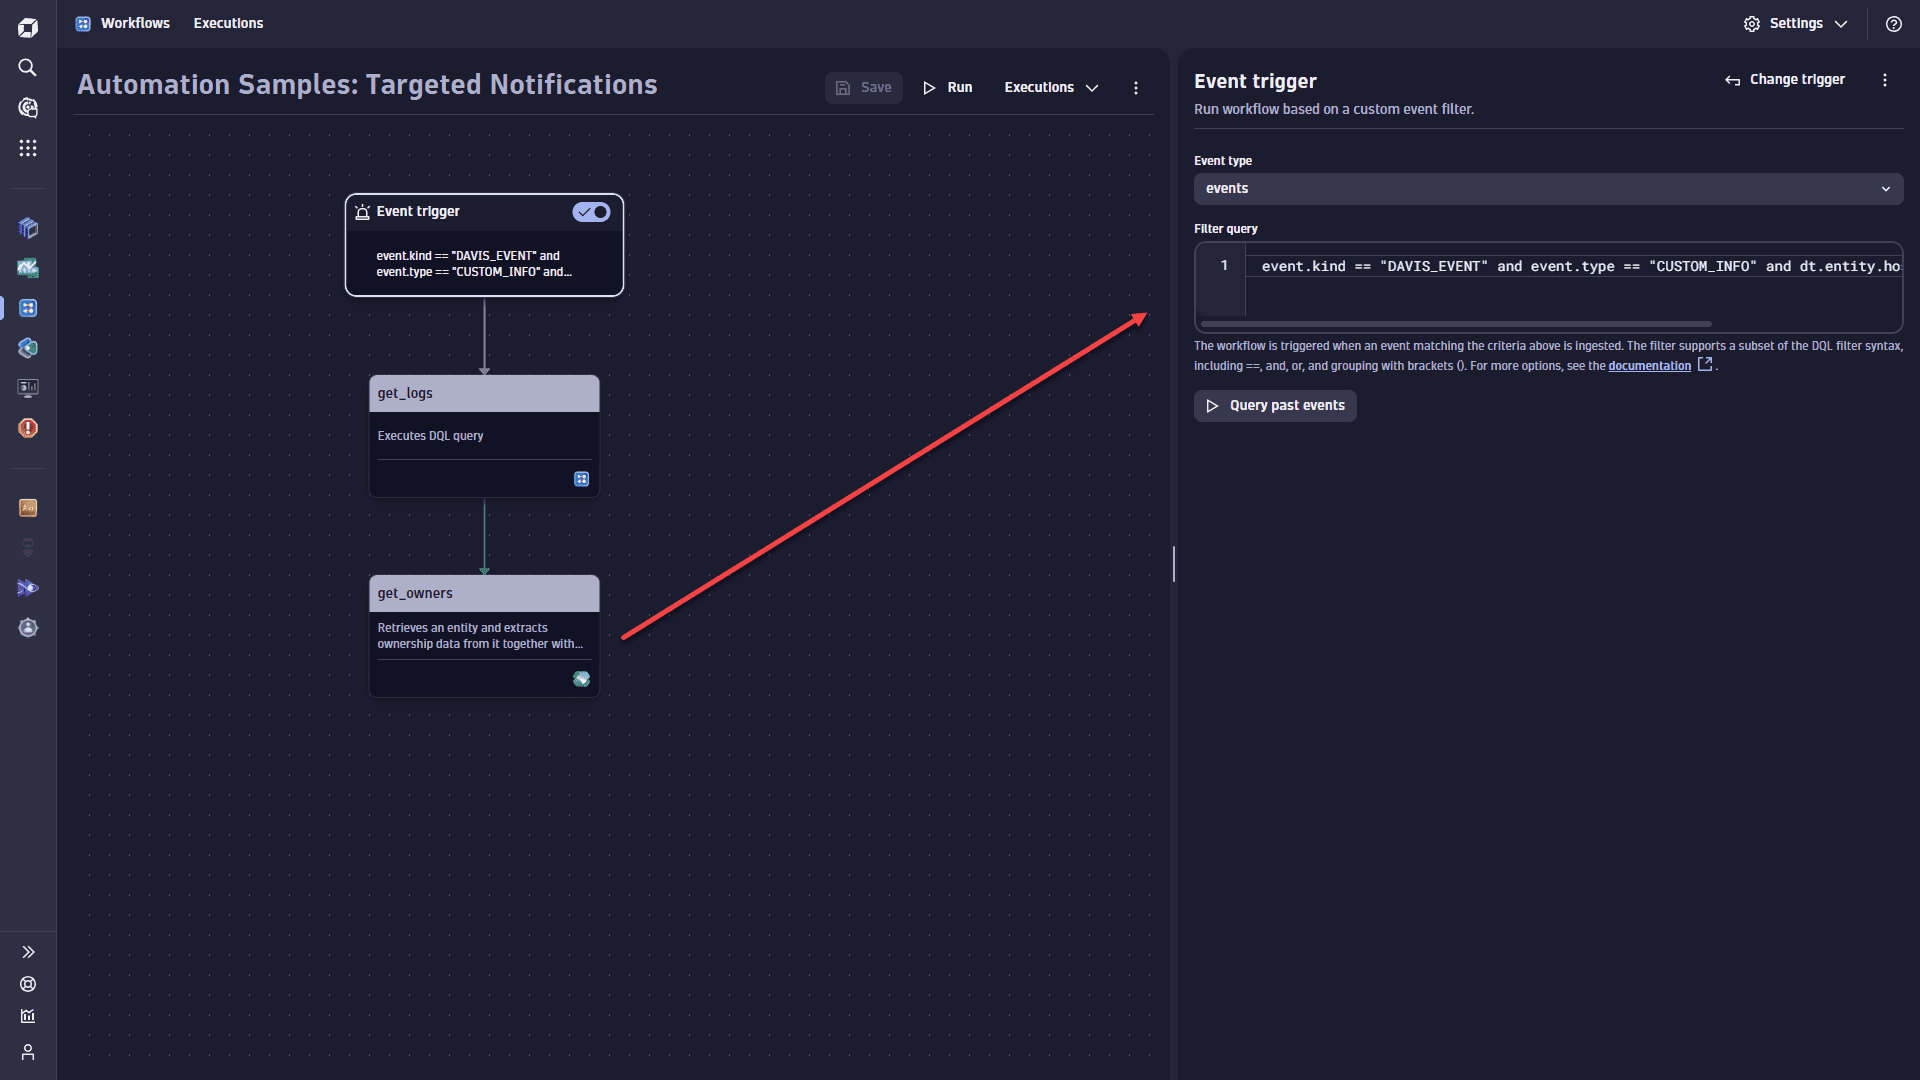
-
Step 6: Run the sample workflow.
Before you select Run for your saved sample workflow, execute Step 2 of the tutorial a few times to simulate host events.
When you have executed your workflow, successful tasks are highlighted in green. Select each ownership action in the execution view to check its output.
get_ownersreturns team information together with the contact details that are grouped by the contact type in JSON format on the Result tab.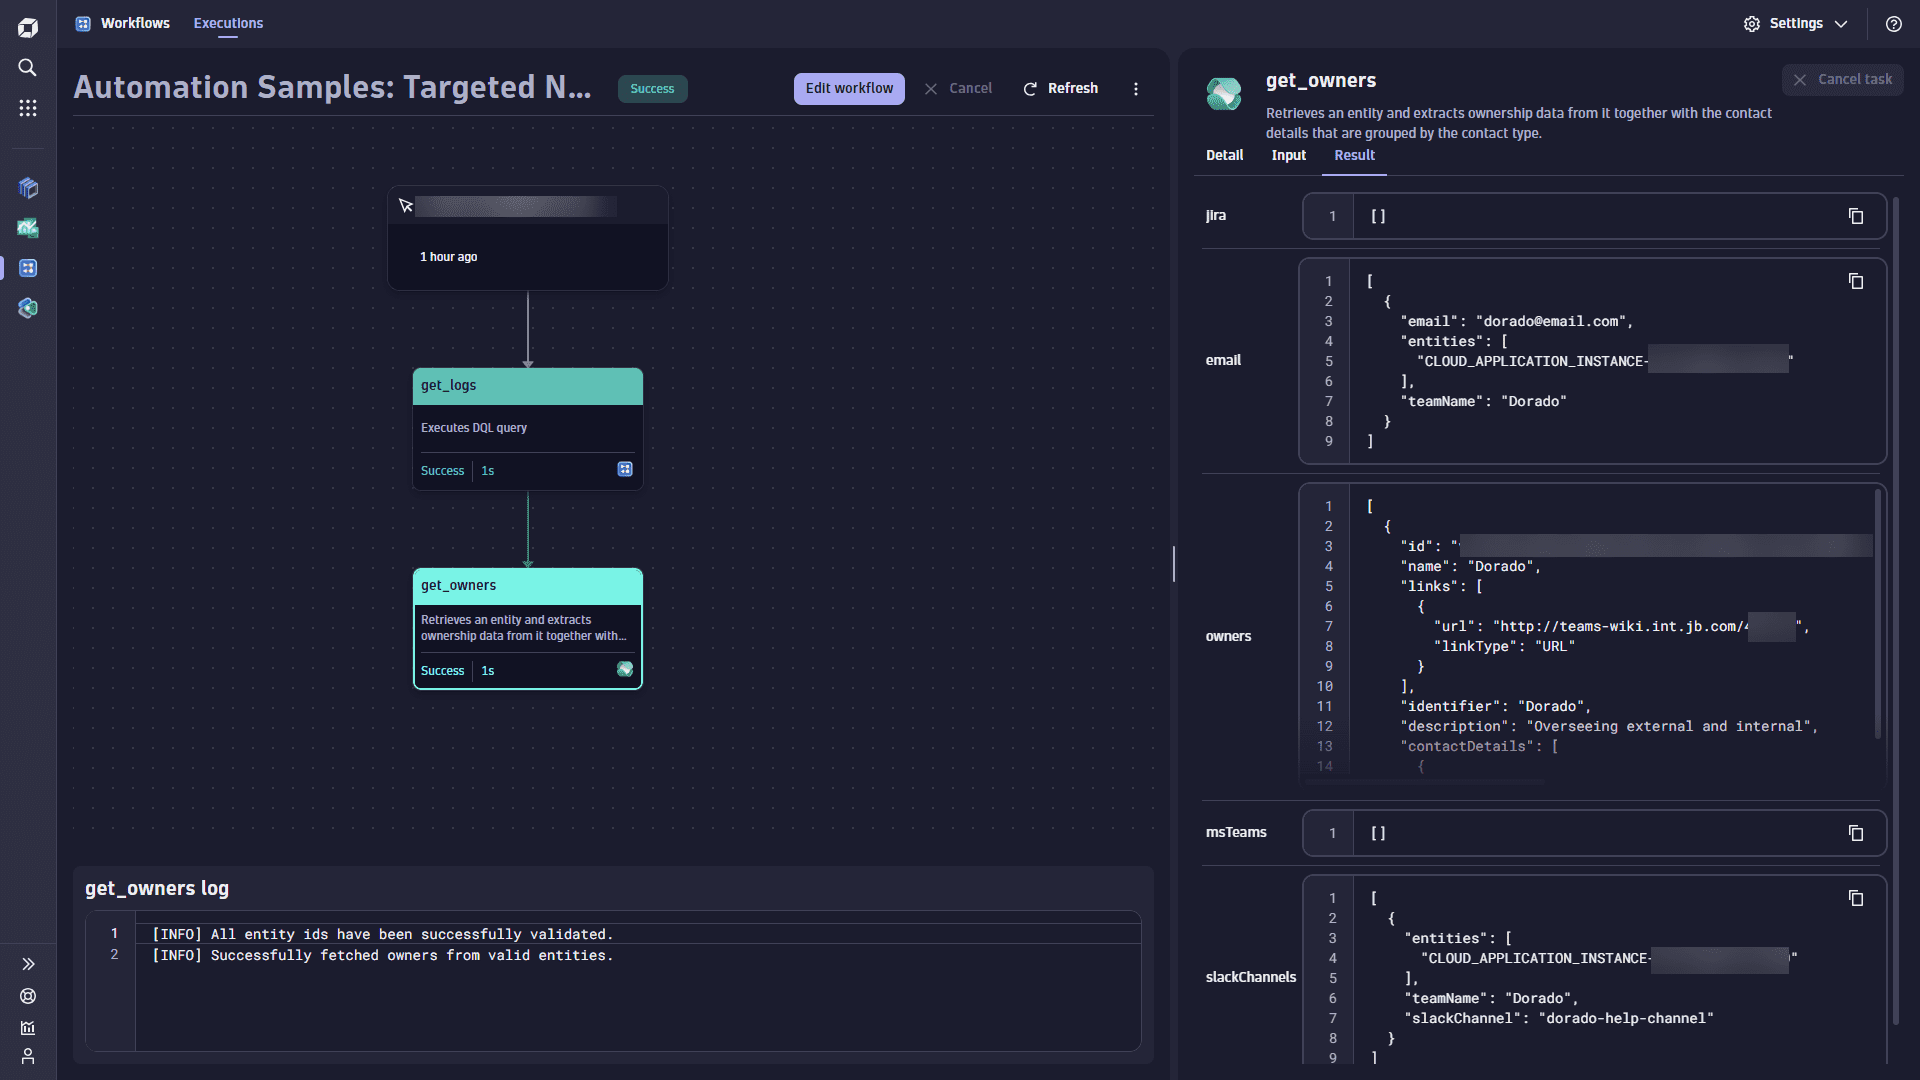
-
Step 7: Set up a Slack action for targeted notifications.
You can extend the sample workflow by integrating with Slack for Workflows
 to send targeted notifications. Likewise, if you extract Jira contact information for the ownership team, you can integrate with Jira for Workflows
  for issue creation.